As Mark Twain once said “There are only 2 certainties in life. Death and taxes”.
Well in SEO, the only certainty is that at some point in your career you’ll deal with a replatform. And unfortunately, with the increasing popularity of Single Page Applications (SPAs) as a framework, it’s more than likely that it’ll involve switching from boring old HTML site to that new hotness of a Javascript framework.
Now, a lot of people have covered Javascript SEO a lot better than I can, so I’m not going to focus too much on that. Instead, I’m going to focus on 1 aspect.
Testing A SPA Site On A Staging Environment.
Yes, like any major project it won’t just be a case of flicking a switch, and away we go. Nah, there’ll be sprints, scrums, kanban boards and testing.
Plenty of testing.
There’s plenty on testing Javascript in general but not much in terms of doing it in a test environment. And considering that before any replatform goes live, there will be weeks of where you’ll stare at a screen so long that you’ll probably go cross-eyed.
What’s the difference between testing a javascript framework Vs … Well, just a normal site?
The basic answer is the way the site is built.
You see, when it comes to Googlebot, HTML is a bit of a straight shooter – you get exactly what you see.
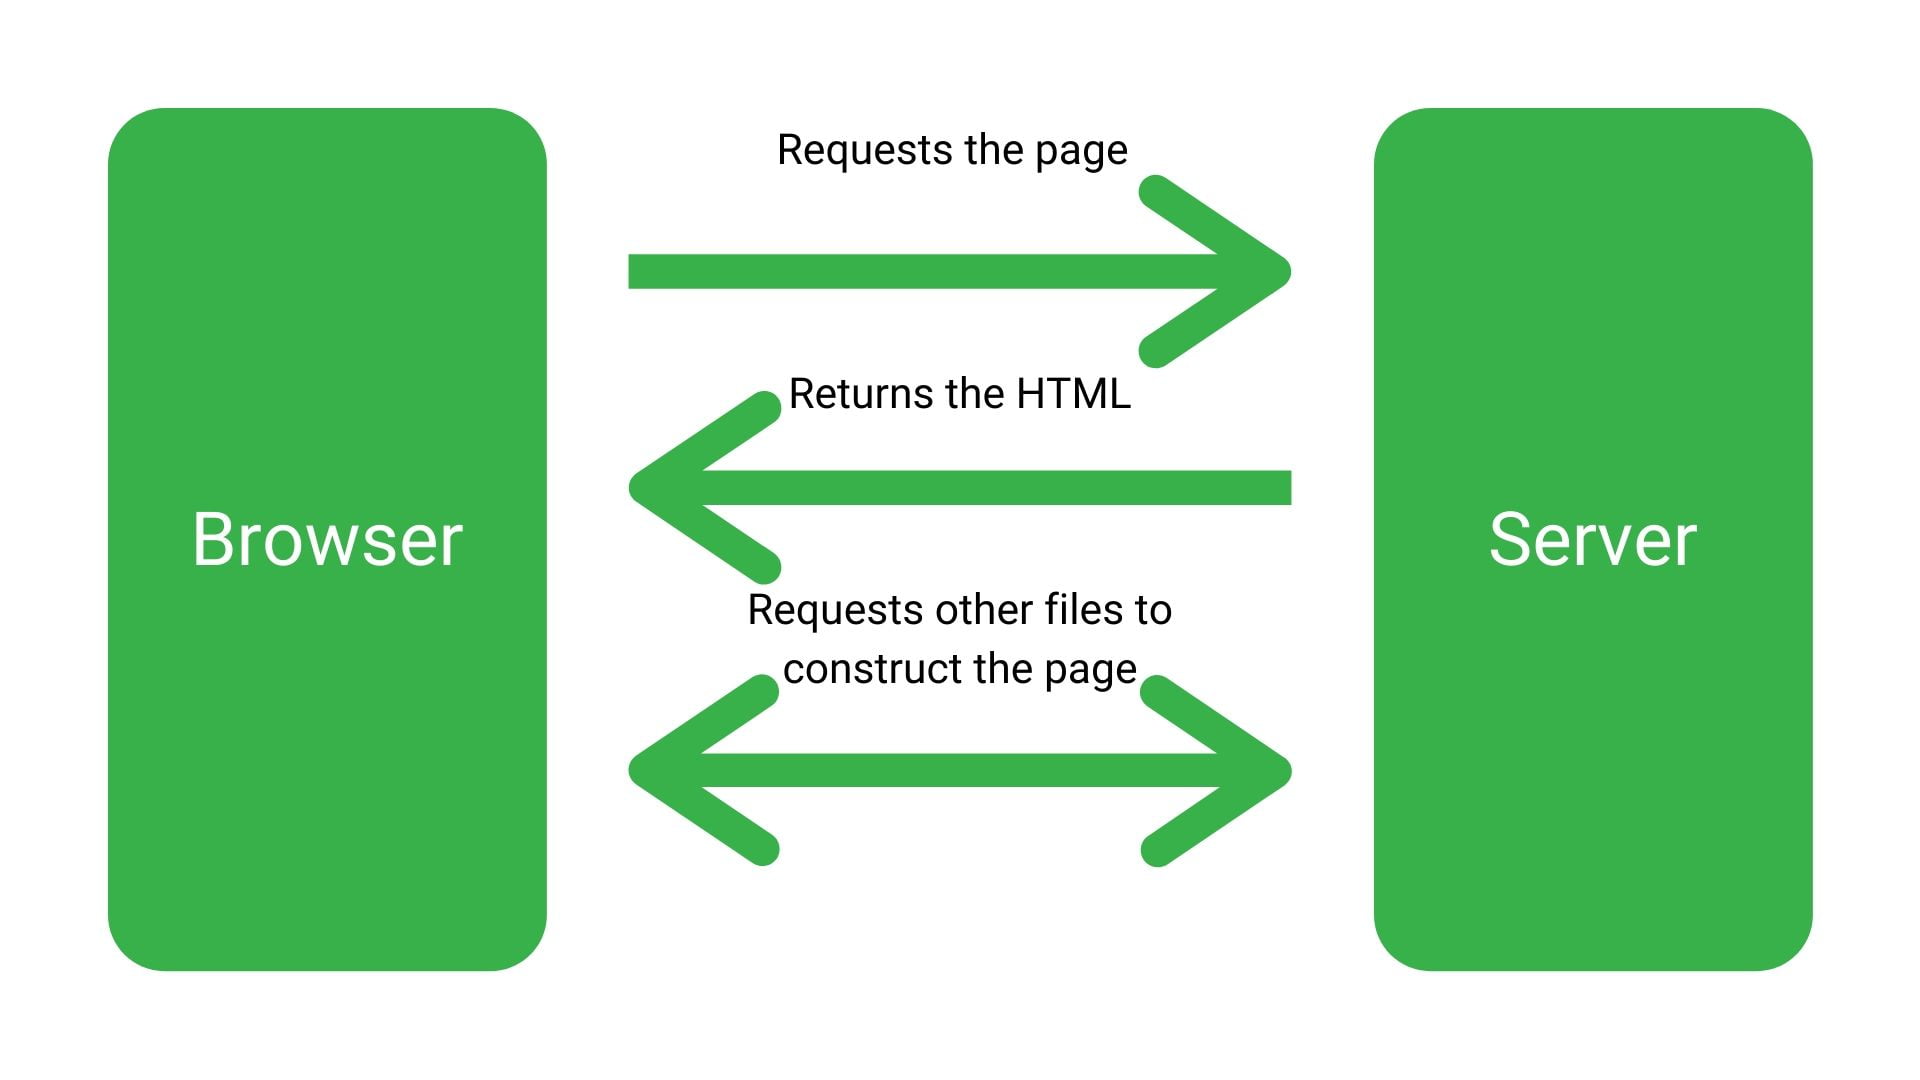
Whereas, frameworks like React, Angular and other SPAs are like shells where it assembles the code in the browser as it goes along.
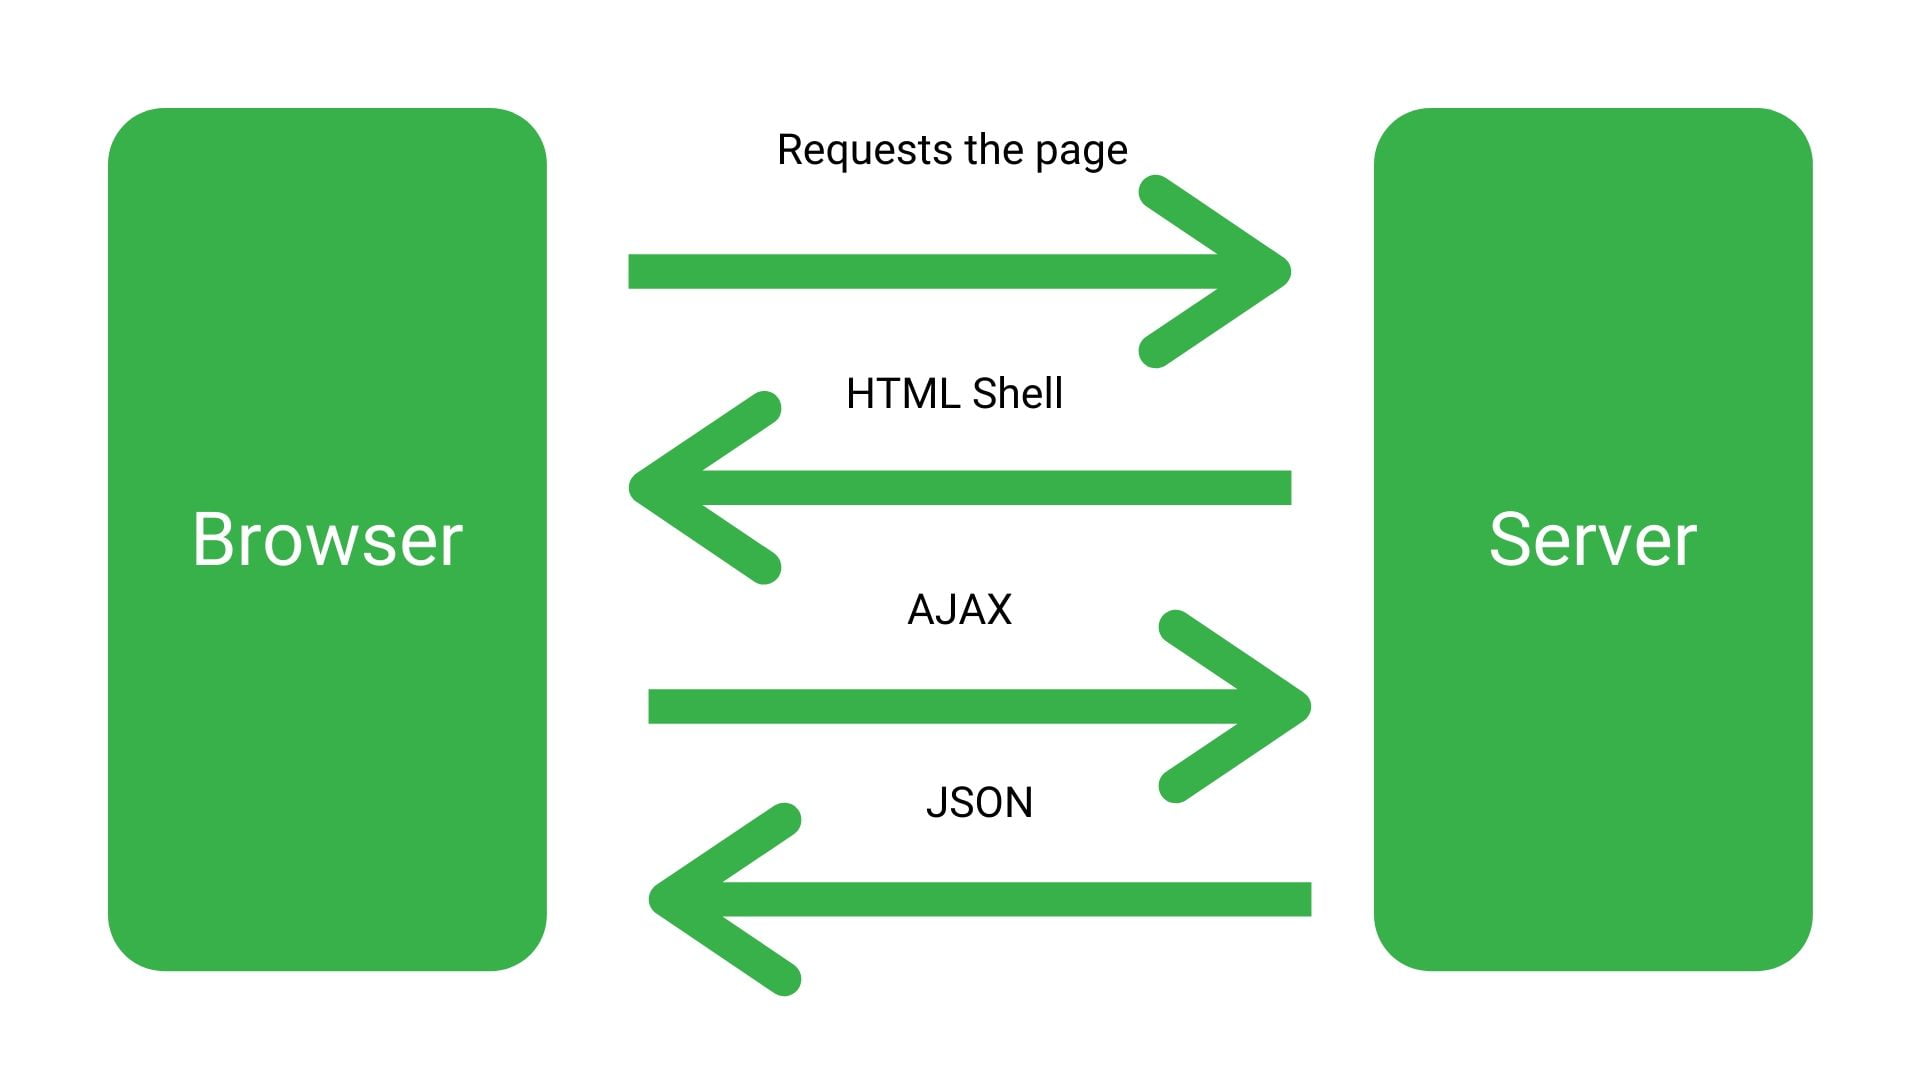
Think of it a bit like flatpack furniture that you’re assembling as you need it.
Which means that the way you test it is entirely different to testing a normal site. One you’re testing a site where it’s obvious, and nothing is going on in the background. The other where there’s more going on than you can see.
Google’s Advice On Testing Javascript Frameworks
Google’s advice is pretty simple when it comes to testing Single Page Applications.
And it goes something like the below:
1) Use the mobile-friendly testing tool to see how Googlebot’s rendered version differs from the version that is rendered in the browser.
2) Use a tunnel with something like Ngrok to access your local files
But the problem with that is they’re both not that practical in the real world for the two reasons below:
- It assumes there’s a live version.
- There’s a massive difference between how local files behave to your test site
When you work for any decent-sized organisation, they’re not going to let any old IP address access your site. They’re only going to let people in the business access it.
That means the mobile testing tool is a no-go. Especially when ten’s of thousands of sites use the same IP address as it.
The workaround that the GOOG suggests is to use something like NGROK to let the mobile-friendly testing tool access the local files on your computer.
The problem with that is that code on your computer behaves wildly different to code that’s hosted on a staging environment for a number of reasons. The biggest one is that it is like doing tests in a laboratory environment. There’s limited outside factors impacting it. That why there are testing sites. So you come closer to replicating how it will behave in the field.
So essentially Google’s advice just isn’t going to cut it, and you’ll need to do something a bit different.
So how do you test a Javascript framework on a staging site?
Good of you to ask.
There’s essentially a 3 step process that you should take.
Step 1: Run the 1st Crawl With A Web crawler
As soon as you get access to the test site, you need to run a crawl on it.
However, it’s not as simple as just setting it up and letting the little spiders scuttle away.
No,no, no.
First, you need to know how the developers have implemented the Single Page Application.
You need to know:
- Are they dynamically rendering it?
- Or are they client-side rendering?
It’s important to understand the difference so I will cover them briefly below, but if you need more details, this article covers it in much more detail.
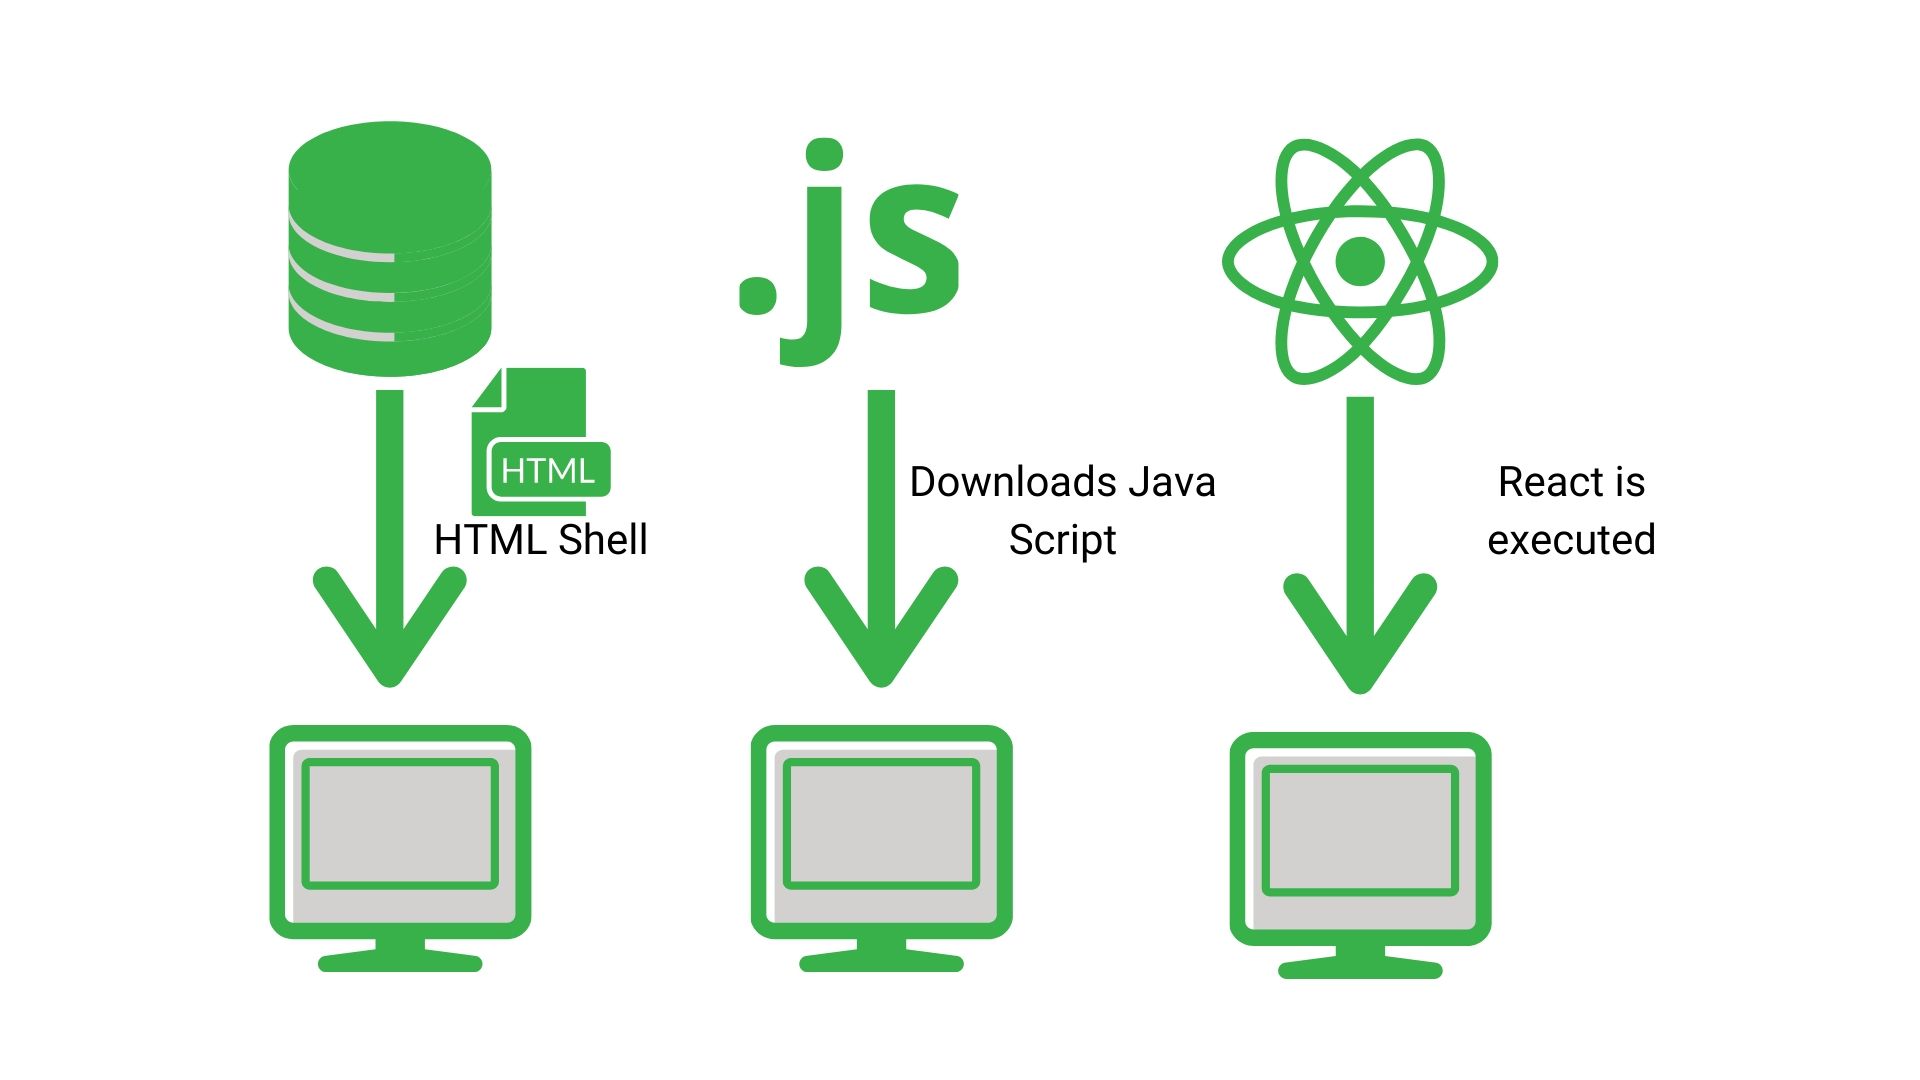
What is client-side rendering?
This is basically letting the browser assemble the page. Or essentially doing nothing server side and letting Googlebot crawl the page, submit it to its rendering services and then assemble it like it’s fresh off the IKEA shelf.
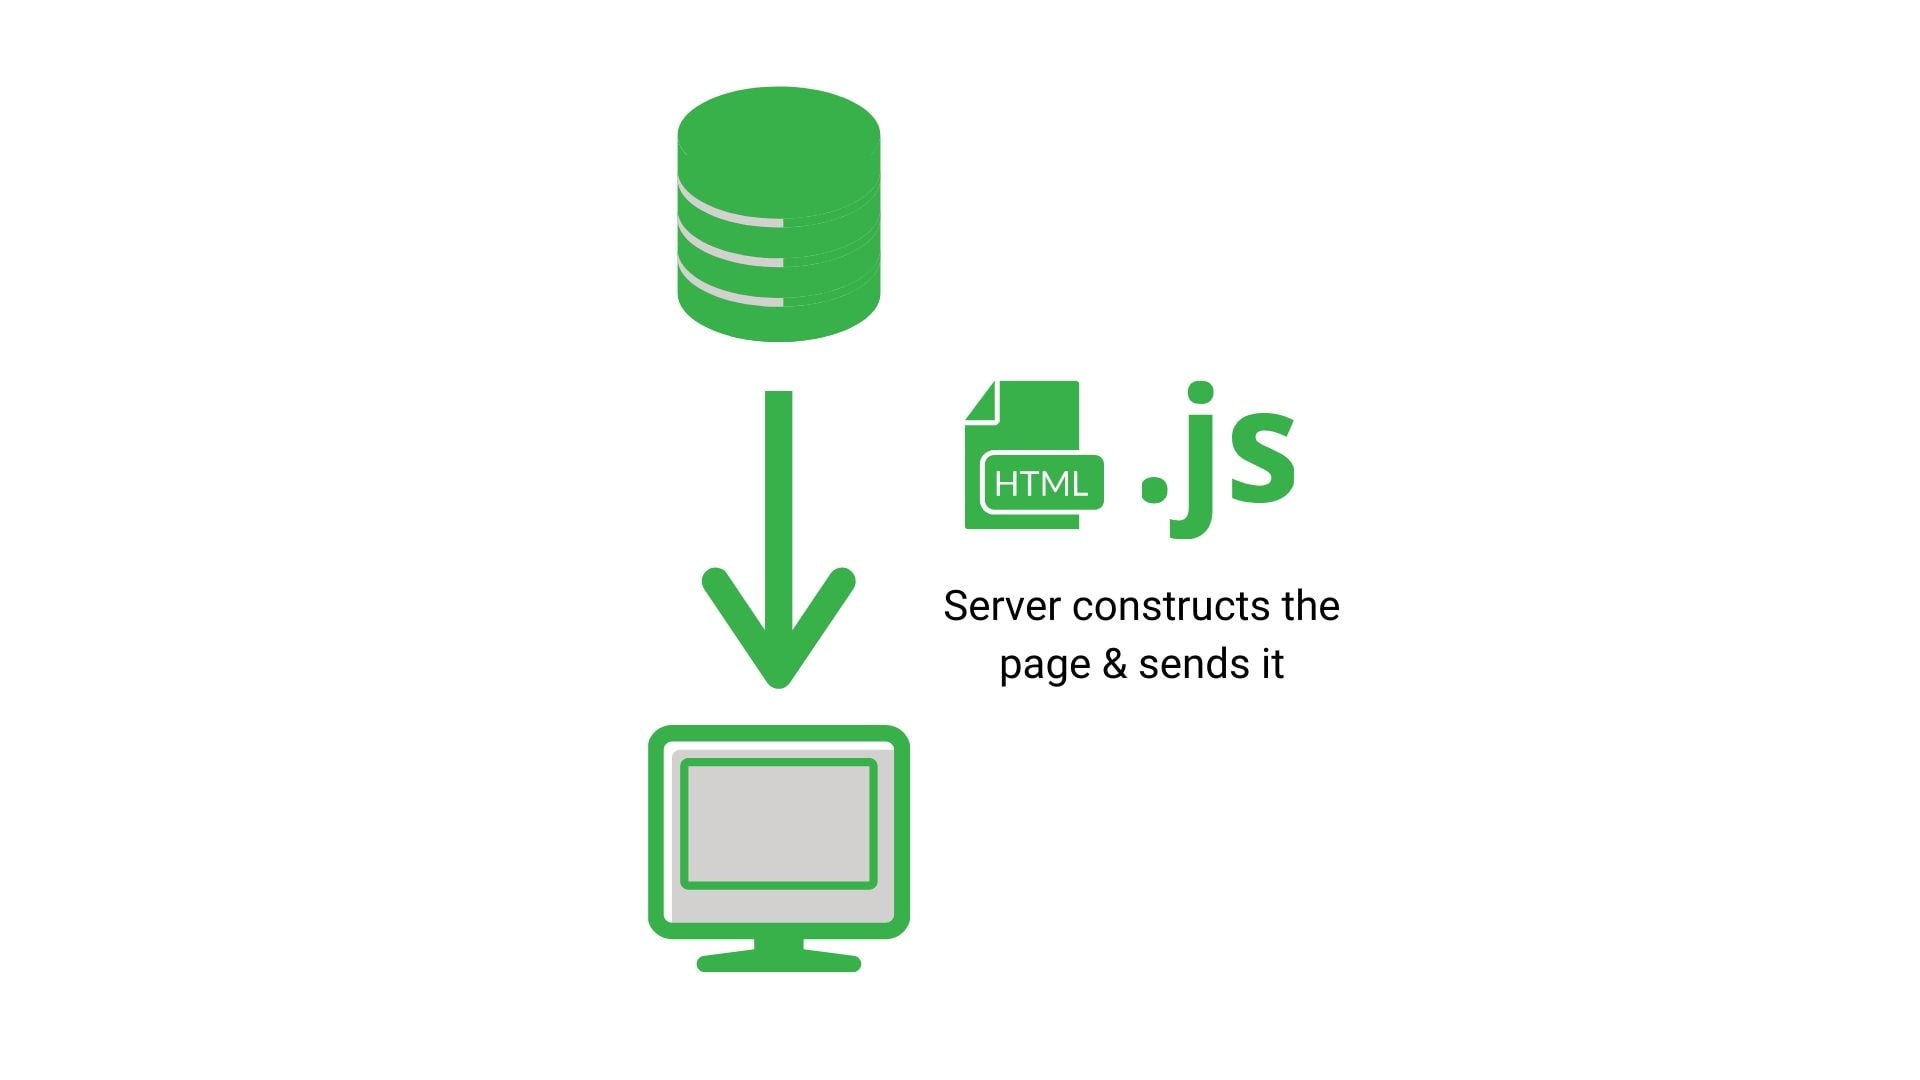
What is Dynamic rendering?
Whereas dynamic rendering is sort of like getting someone to assemble it in a van as it’s being delivered to you.
Which one you choose drastically changes how you test it.
Crawling the test version client-side rendering single page application
This is a lot simpler than the other option. All you need to do is:
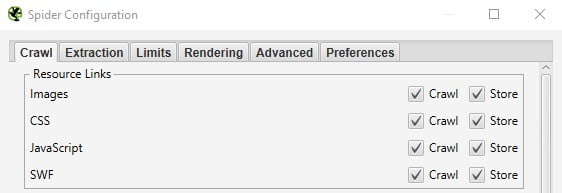
- Make sure that you crawl and store javascript resources
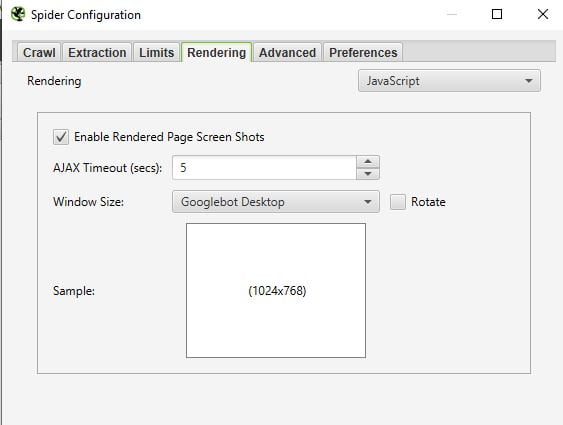
- Make sure you enable javascript rendering
- Then crawl away
The only other thing to watch out for is if you are using a web-based crawler like Deepcrawl. If that’s the case, you need to make sure you whitelist the IP address for the crawler. There’s documentation for how to do that with Deepcrawl here.
If you use Screaming Frog, it’s machine-based, so you’re good to go.
Once you’ve crawled the site, it’s just about comparing what you see in the crawler to what you see on the staging site as well as auditing it for any other issue.
Crawling a dynamic rendering Single Page Application
Now crawling a dynamic rendering javascript framework is a little more complex.
You need to be vigilant of:
- The user agent that the crawler uses
- That you don’t have Javascript crawling enabled
Remember that Dynamic Rendering is basically like someone assembling your site in a van. However, there’s another layer to it. It only does it for some people. So basically it detects when Googlebot or other Search Engines are crawling, and it serves them a preassembled version.
So when you test the site, if the crawler doesn’t have Googlebot or Bingbot as the user agent, it won’t replicate the behaviour of it in the wild.
FYI
Deepcrawl uses Googlebot as a crawler, but Screaming Frog uses its own user agent.
To change the user agent:
- Going to configurations
- Pick “User Agents” from the drop-down
- Pick Googlebot Smartphone
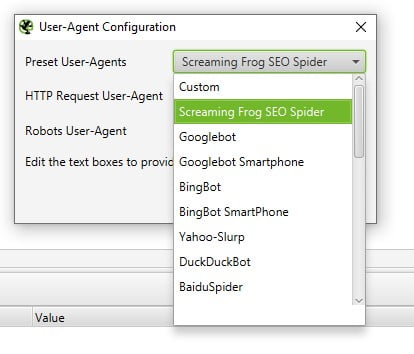
And voila, you should be Dynamically served up a nice rendered slice of your site.
Step 2: Spot Testing In The Browser
You’ve done your big crawl and logged a load of issues you’ve spotted, so now it is time to get an idea around the sites behaviour as you interact with it.
To do that I like to test the site by spoofing Googlebot Smartphone in Chrome Dev Tools and interacting with it.
To spoof Googlebot using Chrome Dev Tools. You just need to follow the below steps:
- Right-click
- Click on inspect
- Click on the drop-down menu in the top right (the three little dots)
- Go to more tools
- Click on network connections
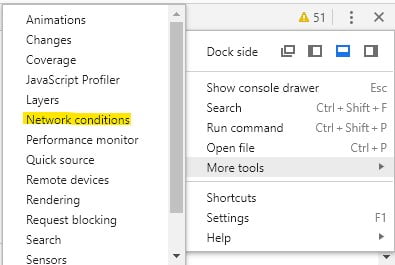
- In the bottom window, it has User-Agent
- Deselect the “Select Automatically” checkbox
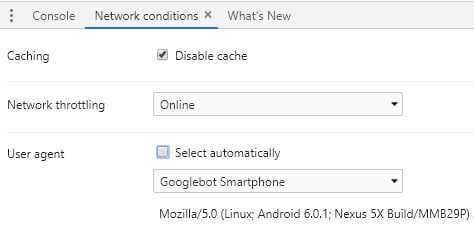
- Change the user agent to Googlebot Smartphone
- Refresh the page, and it should mimic Googlebot’s behaviour
Now there are a few things that you need to factor in:
- Googlebot takes a snapshot. So when you interact with the page that is not Googlebot’s behaviour
- You need to clear cookies. Googlebot is cookieless.
What this step does, is give you a general feel for how the content will display. What elements will and won’t be visible. And what on-page elements you need to inspect in more detail in your next crawl.
Step 3: Crawl the site again
It’s the same process as the first step. Except that now you’re checking up on the fixes you identified in the first crawl as well as things you want to look at in more detail from spot testing in the browser.
Step 4: Release a couple of pages live
Usually, after you’ve done the final crawl and everything passes, you’ll push it live.
But that’s a big mistake.
Remember how the local files aren’t a reflection of how it will behave on the live site. The exact same can be said of the staging site and the live site.
Live sites are usually a lot more complex, a lot more buggy and a lot, lot slower.
This final step is a test to see how the new framework behaves on a template by template basis.
We found out that this step was crucial the hard way.
We had a site that because of tight timelines decided to push live after Step 3.
Everything looked great in the test environments.
It rendered fine. Load times were good. No obvious content was missing.
Then bam!
When it went live, the system that pulled in the pricing in slowed the load so much that only the boilerplate content was getting indexed. And as a result, all of those pages were deemed as duplicates of the homepage and removed from the index.
A week of figuring out a workaround to make the selling system quicker and warming up the cache, we had the issue resolved.
But if we had pushed a couple of pages live before the proper release date, we would have spotted that problem and been able to resolve it in advance.
Step 5: Release and monitor
The big day has come, and it’s just about pushing it live then kicking back.
Except that you can’t.
You’re an SEO, you need to be more paranoid than Claire Danes in Homeland. You need to keep your beady little eyes on it constantly to see how it behaves. Because you never know, a pesky little bug can come crawling out the gutter and throw you a killer curveball. And if you don’t have that inbuilt paranoia, then you might not have spotted it.
So there it is. A brief process on how to test a Javascript framework on a staging site. Hopefully, after reading this, you’ll roughly know what you need to do. Now, it’s just up to you to fill in the blanks.

